Thursday, June 27, 2013

ListView with Custom Adapter

The Android Development Tutorials blog contains Basic as well as Advanced android tutorials.Go to Android Development Tutorials to get list of all Android Topics.


Populate ListView with Custom Adapter

ListView can be populated by ArrayAdapter, Database, ArrayList etc
In this post I will describe how to populate ListView using a Custom Adapter.

Have a look at my previous post
Populating ListView with Database
Populating ListView with ArrayList

ListView with Custom Adapter Example


In this example I have created a listView  and populated it with Custom Adapter.
Each of the ListView item contain two views
TextView SMS Sender : to show SMS Sender Number
TextView SMSBody : to show the SMS Body/content

Here the ListView shows the all the SMSes with Sender Number and SMSBody.

What we need to do ..
Create a Custom Adapter
and add/set  the adapter to ListView.

Add the following permission in your manifest file to read the SMS..
   <uses-permission android:name="android.permission.READ_SMS"/>
   <uses-permission android:name="android.permission.WRITE_SMS"/>


listview_activity_main.xml


<LinearLayout xmlns:android="http://schemas.android.com/apk/res/android"
    android:layout_width="match_parent"
    android:layout_height="match_parent"
    android:background="#D1FFFF"
    android:orientation="vertical">
   
   
    <ListView
        android:id="@+id/listViewSMS"
        android:layout_width="fill_parent"
        android:layout_height="fill_parent"
        android:dividerHeight="0.1dp"
        android:divider="#0000CC"
        >
    </ListView>
   
  </LinearLayout>


listview_each_item.xml


<?xml version="1.0" encoding="utf-8"?>
<LinearLayout xmlns:android="http://schemas.android.com/apk/res/android"
    android:layout_width="match_parent"
    android:layout_height="match_parent"
    android:orientation="vertical" >

    <TextView
        android:id="@+id/textViewSMSSender"
        android:paddingLeft="2dp"
        android:textSize="20dp"
        android:textStyle="bold"
        android:textColor="#0000FF"
        android:layout_width="wrap_content"
        android:layout_height="wrap_content"
        android:text="TextView" />

    <TextView
        android:id="@+id/textViewMessageBody"
        android:paddingLeft="5dp"
        android:textColor="#5C002E"
        android:textSize="17dp"
        android:layout_width="wrap_content"
        android:layout_height="wrap_content"
        android:text="TextView" />

</LinearLayout>
   
  </LinearLayout>


ListViewMainActivity.java


public class ListViewMainActivity extends Activity
{
            ListView listViewSMS;
            Cursor cursor;
            SMSListAdapter smsListAdapter;
            Context context;
            @Override
            protected void onCreate(Bundle savedInstanceState)
            {
                    super.onCreate(savedInstanceState);
                    setContentView(R.layout.listview_activity_main);
                   
                    context=this;
                    listViewSMS=(ListView)findViewById(R.id.listViewSMS);

                    cursor = getContentResolver().query(Uri.parse("content://sms/inbox"), null, null, null, null);
                   
                    // Create the Adapter
                    smsListAdapter=new SMSListAdapter(this,cursor);
                   
                    // Set The Adapter to ListView
                    listViewSMS.setAdapter(smsListAdapter);
                    

                    // to handle click event on listView item
                    listViewSMS.setOnItemClickListener(new OnItemClickListener()
                    {
                            public void onItemClick(AdapterView<?> arg0, View v,int position, long arg3)
                            {
                                // when user clicks on ListView Item , onItemClick is called
                                // with position and View of the item which is clicked
                                // we can use the position parameter to get index of clicked item

                                TextView textViewSMSSender=(TextView)v.findViewById(R.id.textViewSMSSender);
                                TextView textViewSMSBody=(TextView)v.findViewById(R.id.textViewMessageBody);
                                String smsSender=textViewSMSSender.getText().toString();
                                String smsBody=textViewSMSBody.getText().toString();
                               
                                // Show The Dialog with Selected SMS
                                AlertDialog dialog = new AlertDialog.Builder(context).create();
                                dialog.setTitle("SMS From : "+smsSender);
                                dialog.setIcon(android.R.drawable.ic_dialog_info);
                                dialog.setMessage(smsBody);
                                dialog.setButton(DialogInterface.BUTTON_POSITIVE, "OK",
                                        new DialogInterface.OnClickListener() {
                                    public void onClick(DialogInterface dialog, int which)
                                    {
                                   
                                            dialog.dismiss();
                                            return;
                                }   
                                });
                                dialog.show();
                            }
                        });
       
            }
}


SMSListAdapter.java : The Custom Adapter


public class SMSListAdapter  extends BaseAdapter
{
   
    private Context mContext;
    Cursor cursor;
    public SMSListAdapter(Context context,Cursor cur)
    {
            super();
            mContext=context;
            cursor=cur;
          
    }
      
    public int getCount()
    {
        // return the number of records in cursor
        return cursor.getCount();
    }

    // getView method is called for each item of ListView
    public View getView(int position,  View view, ViewGroup parent)
    {
                    // inflate the layout for each item of listView
                    LayoutInflater inflater = (LayoutInflater) mContext.getSystemService(Context.LAYOUT_INFLATER_SERVICE);
                    view = inflater.inflate(R.layout.listview_each_item, null);
           
                    // move the cursor to required position
                    cursor.moveToPosition(position);
                   
                    // fetch the sender number and sms body from cursor
                    String senderNumber=cursor.getString(cursor.getColumnIndex("address"));
                    String smsBody=cursor.getString(cursor.getColumnIndex("body"));
                  
                    // get the reference of textViews
                    TextView textViewConatctNumber=(TextView)view.findViewById(R.id.textViewSMSSender);
                    TextView textViewSMSBody=(TextView)view.findViewById(R.id.textViewMessageBody);
                   
                    // Set the Sender number and smsBody to respective TextViews
                    textViewConatctNumber.setText(senderNumber);
                    textViewSMSBody.setText(smsBody);
                   
       
                    return view;
    }

    public Object getItem(int position) {
        // TODO Auto-generated method stub
        return position;
    }

    public long getItemId(int position) {
        // TODO Auto-generated method stub
        return position;
    }
}

ListView with Custom Adapter


New Advance Topics:                   Android LiveWallpaer Tutorial
Android ImageSwitcher                    Android TextSwitcher                                Android ViewFlipper
Android Gesture Detector               Handling/Detecting Swipe Events                Gradient Drawable
Detecting Missed Calls                    Hide Title Bar                                           GridView Animation
Android AlarmManager                 Android BootReceiver                       Vibrate Phone In a Desirable Pattern    
Developing for Different Screen Sizes           Showing Toast for Longer Time       Publishing your App
How to publish Android App on Google Play
Android TextWatcher                               Android ExpandableListView

 Beginning With Android
      Android : Introduction(What is Android)                                                              Configuring Eclipse for Android Development
     Creating Your First Android Project                                           Understanding Android Manifest File of your android app

 Advance Android Topics                                                              Customizing Android Views


Working With Layouts                                                                Working With Views

Understanding Layouts in Android                                                   Using Buttons and EditText in Android
Working with Linear Layout (With Example)                                     Using CheckBoxes in Android
Nested Linear Layout (With Example)                                              Using AutoCompleteTextView in Android                                                                                          Grid View
Relative Layout In Android                                                               ListView
Table Layout                                                                                   Android ProgressBar
Frame Layout(With Example)                                                          Customizing ProgressBar
Absolute Layout                                                                             Customizing Radio Buttons
Grid Layout                                                                                    Customizing Checkboxes In Android

Android Advance Views
Android Spinner                                                                           Android GalleryView
Android TabWidget                                                                      Android ExpandableListView

Android Components                                                                 Dialogs In Android

Activity In Android                                                                    Working With Alert Dialog
Activity Life Cycle                                                                    Adding Radio Buttons In Dialog
Starting Activity For Result                                                       Adding Check Boxes In Dialog
Sending Data from One Activity to Other in Android                    Creating Customized Dialogs in Android
Returning Result from Activity                                                   Creating Dialog To Collect User Input
Android : Service                                                                     DatePicker and TimePickerDialog
BroadcastReceiver                                                                   Using TimePickerDialog and DatePickerDialog In android

Menus In Android                                                                ListView:
Creating Option Menu                                                               Populating ListView With DataBase
Creating Context Menu In Android                                              Populating ListView with ArrayList
                                                                                               ListView with Custom Adapter

Toast                                                                                      Working With SMS
Customizing Toast In Android                                                       How to Send SMS in Android
Customizing the Display Time of Toast                                        How To Receive SMS
Customizing Toast At Runtime                                                  Accessing Inbox In Android
Adding Image in Toast
Showing Toast for Longer Time


TelephonyManager                                                            Storage: Storing Data In Android
Using Telephony Manager In Android                                          SharedPreferences In Android
                                                                                              Reading and Writing files to Internal Stoarage

Working With Incoming Calls                                       DataBase :  Introduction of SQLiteDataBase
How To Handle Incoming Calls in Android                                Working With Database in Android
How to Forward an Incoming Call In Android                            Creating Table In Android
CALL States In Android                                                          Inserting, Deleting and Updating Records In Table in Android


Miscellaneous
Notifications In Android
How To Vibrate The Android Phone
Sending Email In Android
Opening a webpage In Browser
How to Access PhoneBook In Android
Prompt User Input with an AlertDialog
How to Hide Title Bar In Android
How to show an Activity in Landscape or Portrait Mode only.
How to Set an Image as Wallpaper.


Wednesday, June 26, 2013

Android GestureDetector Example

In android can listen to the gestures and events performed by user on screen.

To listen the Gestures in Android we need to do 3 things
1: Create Class GestureListener which should extends GestureDetector.SimpleOnGestureListener
2: Override s all the callback methods of GestureDetector.SimpleOnGestureListener
3:  Bind the gestureDetector to GestureListener

 GestureListener.java


class GestureListener extends GestureDetector.SimpleOnGestureListener
{
   
       static String currentGestureDetected;
      
      // Override s all the callback methods of GestureDetector.SimpleOnGestureListener
      @Override
      public boolean onSingleTapUp(MotionEvent ev) {
          currentGestureDetected=ev.toString();
      
        return true;
      }
      @Override
      public void onShowPress(MotionEvent ev) {
          currentGestureDetected=ev.toString();
       
      }
      @Override
      public void onLongPress(MotionEvent ev) {
          currentGestureDetected=ev.toString();
      
      }
      @Override
      public boolean onScroll(MotionEvent e1, MotionEvent e2, float distanceX, float distanceY) {
          currentGestureDetected=e1.toString()+ "  "+e2.toString();
     
        return true;
      }
      @Override
      public boolean onDown(MotionEvent ev) {
          currentGestureDetected=ev.toString();
       
        return true;
      }
      @Override
      public boolean onFling(MotionEvent e1, MotionEvent e2, float velocityX, float velocityY) {
          currentGestureDetected=e1.toString()+ "  "+e2.toString();
        return true;
      }
}


MainActivity.java

public class MainActivity extends Activity
{
          
            private GestureDetector mGestureDetector;
            @Override
            protected void onCreate(Bundle savedInstanceState)
            {
                    super.onCreate(savedInstanceState);
                    setContentView(R.layout.activity_main);
                   
                    // Bind the gestureDetector to GestureListener
                    mGestureDetector = new GestureDetector(this, new GestureListener());
            }

            // onTouch() method gets called each time you perform any touch event with screen
            @Override
            public boolean onTouchEvent(MotionEvent event)
            {
                //method onTouchEvent of GestureDetector class Analyzes the given motion event
                //and if applicable triggers the appropriate callbacks on the GestureDetector.OnGestureListener supplied.
                //Returns true if the GestureDetector.OnGestureListener consumed the event, else false
.
               
                boolean eventConsumed=mGestureDetector.onTouchEvent(event);
                    if (eventConsumed)
                    {
                        Toast.makeText(this,GestureListener.currentGestureDetected,Toast.LENGTH_LONG).show();
                        return true;
                    }
                    else
                        return false;
            }
}


Gradient Drawable In Android

In android, we can create Gradient drawable and use them as background resource for TextViews, Buttons, ListView etc. Gradient helps to make the the GUI better and stylish.

Gradient Drawable Example


In this example I have created 3 gradient drawables.
Gradient Drawable are stored in drawable folder inside "res" folder of your app.

If "drawable" folder is not in "res" folder, create a "drawable" folder inside "res" folder and put all the gradient drawable xml files in it.


1st Gradient Drawable

Darker to Lighter shade


gradient_drawable1.xml

<?xml version="1.0" encoding="utf-8"?>
<selector xmlns:android="http://schemas.android.com/apk/res/android">
    <item>
        <shape>
            <gradient
                android:startColor="#4C4C43"
                android:endColor="#B8B894"
                android:angle="270" />
        </shape>
    </item>
</selector>


2nd Gradient Drawable

 Lighter to Darker shade


Gradient Drawable


gradient_drawable2.xml

<?xml version="1.0" encoding="utf-8"?>
<selector xmlns:android="http://schemas.android.com/apk/res/android">
    <item>
        <shape>
            <gradient
                android:startColor="#B8B894"
                android:endColor="#4C4C43"
                android:angle="270" />
        </shape>
    </item>
</selector>


3rd Gradient Drawable

 Darker at Boundaries  and Lighter in center


Gradient Drawable


gradient_drawable3.xml

<?xml version="1.0" encoding="utf-8"?>
<selector xmlns:android="http://schemas.android.com/apk/res/android">
    <item>
        <shape>
            <gradient
                android:startColor="#4C4C43"
                android:centerColor="#B8B894"
                android:endColor="#4C4C43"
                android:angle="270" />
        </shape>
    </item>
</selector>


In below layout I have used these gradient drawable as background resource of Button.


Gradient Drawable


<LinearLayout xmlns:android="http://schemas.android.com/apk/res/android"
    android:layout_width="fill_parent"
    android:layout_height="fill_parent"
    android:orientation="vertical" >

    <Button
        android:layout_marginTop="150dp"
        android:id="@+id/button1"
        android:textSize="24dp"
        android:layout_width="fill_parent"
        android:layout_height="wrap_content"
        android:background="@drawable/gradient_drawable1" <!-- set as background resource -->
        android:text="Button With Gradient Drawable 1" />
   
     <Button
        android:layout_marginTop="20dp"
        android:id="@+id/button1"
        android:textSize="24dp"
        android:layout_width="fill_parent"
        android:layout_height="wrap_content"
        android:background="@drawable/gradient_drawable2"
<!-- set as background resource -->
        android:text="Button With Gradient Drawable 2" />
    
      <Button
        android:layout_marginTop="20dp"
        android:id="@+id/button1"
        android:textSize="24dp"
        android:layout_width="fill_parent"
        android:layout_height="wrap_content"
        android:background="@drawable/gradient_drawable3"
<!-- set as background resource -->
        android:text="Button With Gradient Drawable 3" />


</LinearLayout>

Wednesday, May 22, 2013

Connect, Click and Convert Around the World with Google Shopping

On June 11th, Google Shopping will complete the transition to a commercial model in the United Kingdom, Germany, France, Japan, Italy, Spain, the Netherlands, Brazil, Australia, Switzerland and the Czech Republic. When the transition is complete, free product listings will no longer appear on Google Shopping. We believe this new model, built on Product Listing Ads, will help retailers of all sizes connect the right products with customers around the world, increase clicks to their sites, and convert more shoppers into buyers.

Onward and upward

We've been pleased with the rapid adoption of Google Shopping by the global retail community. Over 1 billion products are now being promoted globally on Google Shopping, largely driven by a 300% year-on-year growth in participating sellers (including many aggregators and marketplaces). And we’ve seen 20% growth in traffic to retailers over the past year.

Global merchant success stories

We’ve heard from a variety of retailers around the world who have embraced Google Shopping and are seeing great results. Check out the highlights below:

France
eSearchVision helped Vertbaudet, a retailer specializing in children’s apparel and decor, launch a Product Listing Ads campaign that accounted for 7% of sales from their website in the Autumn-Winter 2012 season.
JapanEnigmo runs a social shopping site offering domestic customers brand items from sellers outside of Japan. After they optimized their data on Google Shopping and created a Product Listing Ads campaign, Enigmo succeeded in increasing the number of new customer sign-ups.
NetherlandsTuinFlora.com is a family-owned business that exports flower bulbs, seeds and plants across Europe and the US. They promoted their products on Google Shopping for their top export markets and saw their conversion rates increase by 20%.
United Kingdom
Forward3D helped New Look, a leading fashion retailer for men, women and teens in the UK, experiment with Product Listing Ads to increase reach and improve engagement beyond standard text ads. They used Merchant Center labels to categorize the catalogue by price bracket, balancing CPAs and ROI more effectively. As a result, New Look saw a 24% increase in revenue week over week, 68% overall revenue growth and 40% improved ROI. 

Equimedia helped WHSmith.co.uk, a retailer of books, stationery, and more, promote their products on Google Shopping. Product Listing Ads represent 6% of total PPC spend but generate 10% of the revenue, producing a total ROI that is 59% better than standard text ads.
Germany
Hurra.com helped bonprix, a leading fashion retailer, complement standard text ads with Product Listing Ads, achieving a 50% higher click-through rate and 30% higher conversion rate at the same cost-per-click.

Make the most of Google Shopping

Whether you’re just getting started with Product Listing Ads or are looking for more advanced optimization strategies, we’ve compiled our top recommendations to succeed with Google Shopping below. Read on for these quick tips and sign up for one of our upcoming Hangouts on Air in your country to learn how you can prepare for the global commercial transition.


If you’re new to Product Listing Ads

If  you’re already using Product Listing Ads

For agencies
  • Join Google Engage to get the latest agency news, trainings and support from the Google Shopping team

Need additional assistance? We’re happy to help. Feel free to visit our Help Center or call one of our Shopping specialists in your country below:
  • Australia - 1800 087 124
  • Brazil - 0800 727 8947
  • Czech Republic - 800 500 353
  • France - 805 540 727
  • Germany - 0800 5894933
  • Italy - 800930819
  • Japan - 0120-984-684
  • Netherlands - 0800 2500026
  • Spain - 900 814 539
  • Switzerland - 0800 002539
  • United Kingdom - 0800 169 0711

Posted by Sameer Samat, Vice President of Product Management, Google Shopping


Tuesday, May 21, 2013

An update to Google Checkout for merchants

Today, we’re letting web merchants know that in six months, Google Checkout will be retired as we transition to Google Wallet — a platform that enables merchants to meet the demands of a multi-screen world where consumers shop in-stores, at their desks and on their mobile devices.

Just last week, we announced two enhancements to the Google Wallet platform that are simple to integrate. The Instant Buy API enables merchants to offer a fast buying experience to Google Wallet shoppers buying physical goods and services on their Android apps and websites, while processing their own payments. In addition, the new Wallet Objects API enables merchants to engage their customers with loyalty, offers, and more.

All Google Play developers will continue to be supported. Also, shoppers can continue to use Google Wallet to make safer and more secure payments anywhere they see the Google Wallet button.

What this means for Checkout merchants
Merchants can continue to accept payments using Google Checkout until November 20, 2013.
  • If you don't have your own payment processing, you will need to transition to a different solution within six months. To make things easier, we've partnered with Braintree, Shopify and Freshbooks to offer you discounted migration options.
  • If you are a U.S. merchant that does have payment processing, you can apply for Google Wallet Instant Buy, which offers a fast buying experience to Google Wallet shoppers.
We invite merchants to join us for a live webinar on May 23, 2013 at 10AM PST to learn more. Or, you can visit the Help Center for more details.

What this means for Google Play developers
Developers selling through other Google properties (such as Google Play, Chrome Web Store and Offers Marketplace) will continue to be supported and will automatically transition to the Google Wallet Merchant Center in the next few weeks.

What this means for shoppers
Shoppers can continue to use Google Wallet to make purchases on merchant apps and sites (such as Priceline, Uber, and Rue La La), as well as on Google properties, such as Google Play and Chrome Web Store. Just look for the Google Wallet button to make safer and more secure payments.

Finally, we’d like to thank our merchant partners that have used Google Checkout and we look forward to helping many more businesses grow with Google Wallet.

Posted by Justin Lawyer, Senior Product Manager, Google Wallet


Thursday, May 16, 2013

Connect your loyalty programs, offers and more to Google Wallet with the Wallet Objects API

Consumers want access to all of their loyalty cards, offers, and more on their smartphone. An average household has 18 loyalty cards but use less than half of these cards regularly because of the inconvenience. And the same goes for tickets, membership cards and other items.

With this vision in mind, we are announcing the Google Wallet Objects API. As a developer, this platform enables you to:
  • Save anything to Google Wallet: Integrate your loyalty programs, offers and more into Google Wallet. Users can save these items directly to their Google Wallet for easy use.
  • Drive customer engagement with loyalty and offers: Showcase your brand, acquire users and engage them through instant loyalty sign-up, real-time updates and offers.
  • Benefit from the broader Google ecosystem: With Google's location services, your users get timely notifications about their saved Wallet objects. Additionally, with a simple upgrade path to Google Offers, you can distribute your offers across Google properties — including Adwords, the Google Display Network and Google Maps for Mobile — and benefit from Google's targeting capabilities.
Integration is easy, and you can work with one of our partners to make it even easier. Partners that provide tools to speed integration include Accelitec, Blackhawk, Loyalty Lab, Paytronix, ProfitPoint, Urban Airship and Vibes.

We would also like to thank our partners that have already started integrating with the Wallet Objects API. These include Alaska Airlines, Belly, BillGuard, The Body Shop, BJs Restaurants, Raley's, Red Mango, Marriott Rewards and RetailMeNot. Attendees at Google I/O can see demo loyalty integrations from Alaska Airlines and The Body Shop, and offers integration from RetailMeNot.

We plan to launch these loyalty programs, offers and more to consumers as soon as we can. In the meantime, if you're a merchant or developer, you can learn more, sign up and start building innovative capabilities for your consumers.

Posted by Pali Bhat, Group Product Manager, Google Wallet


Send money to friends with Gmail and Google Wallet

Paying back your friends is now as simple as sending an email, whether you're chipping in for lunch or reimbursing your roommate for your share of the rent.

Google Wallet is now integrated with Gmail, so you can quickly and securely send money to friends and family directly within Gmail — even if they don't have a Gmail address. It's free to send money if your bank account is linked to Google Wallet or using your Google Wallet balance, and low fees apply to send money using your linked credit or debit card.


To send money in Gmail, hover over the attachment paperclip, click the $ icon to attach money to your message, enter the amount you wish to send, and press send.

While sending money in Gmail is currently only available on desktop, you can send money from Google Wallet at wallet.google.com from your phone or laptop. You will need to have set up Google Wallet to send and receive money, and Google Wallet Purchase Protection covers you 100% against eligible unauthorized payments.

We're rolling out this feature over the coming months to all U.S. Gmail users over 18 years old, so keep an eye out for the $ icon in the attachment options. You can also get earlier access if your friends have the feature and send money to you.

To learn more, visit our website.

Posted by Travis Green, Product Manager, Google Wallet


Fast and easy checkout for Android apps selling physical goods and services

Shopping for physical goods on mobile devices is a difficult experience for consumers, leading to 97% of mobile shoppers abandoning their shopping carts. Last October, we launched a Google Wallet API to speed up payments on mobile sites. Today, we are inviting U.S. developers to sign up for our new Google Wallet Instant Buy Android API, which makes buying in native Android apps fast and easy.

The Instant Buy API is designed for merchants and developers selling physical goods and services, who already have a payment processor and are looking to simplify the checkout experience for their customers. Developers selling digital goods within their apps will continue to use Google Play In-app Billing, which offers full payment processing capability, including support for carrier billing and gift cards.

The Instant Buy API provides Android developers with these important benefits:
  • Fast checkout for Android users buying physical goods. Users who buy on Google properties have set up Google Wallet. They can now checkout in Android apps in as few as 2 clicks without having to manually enter their billing or shipping information. Google Wallet securely sends this information to the developer with the user's permission.
  • Easy app registration. More logged in users. By implementing Google+ Sign-in along with Instant Buy, developers can enable users to sign-in directly with their Google account, instantly creating an app registration. Having more logged in users allows developers to deliver a highly engaging, personalized experience.
  • More secure payments. All transactions are monitored for fraud 24/7 and covered by Google Wallet Purchase Protection to enable a safer shopping experience for your customers.
  • Easy integration. No Google fees. Since Google is not processing payments or managing fulfillment, there are no additional fees or complex integrations.


Apps integrated with Google Wallet will require the latest version of Google Play Services, which is rolling out to all Android devices in the next day or so.

We'd like to thank our launch partners for integrating early and helping us create a great checkout experience for Android users:
  • Airbnb lets you list, discover, and book unique accommodations worldwide.
  • Booking.com is your key to the best deals on hotels, apartments, and more in over 41,000 destinations.
  • Expedia helps 30 million travelers a month find what they are looking for. One traveler at a time.
  • Fancy allows you to discover and buy goods from a crowd-curated catalog.
  • GoPago live POS allows merchants to broadcast their business to customer smartphones, enabling customers to browse, order, and pay in advance.
  • NFC Task Launcher lets you build macros on your phone that respond to your NFC, WiFi, and Bluetooth triggers.
  • Priceline helps you book the best prices on hotels when you're on the go.
  • Rue La La is the destination for the most desired brands and curated Boutiques at Members-only prices.
  • Tabbedout lets you pay your restaurant or bar tab securely with your phone.
  • Uber gets you a ride with a tap of a button. Request a pickup at your location, track your driver's progress, and pay seamlessly in-app.
  • Wrapp lets you give free and paid gift cards from your top brands.
To learn more, please visit our Google Wallet for Business site. For the latest updates on Google Wallet please subscribe to our +Page.

Posted by Prakash Hariramani, Senior Product Manager, Google Wallet


Thursday, May 9, 2013

Updated Google Shopping feed specification

Last year, we announced the rollout of the new Google Shopping commercial model built on Product Listing Ads both in the United States and globally. We believe these changes, and the improved user experience, will create new opportunities for merchants and help retailers of all sizes attract more customers to their stores.

The quality of data provided by merchants is critical for achieving these goals. Therefore, we're announcing some changes to the Google Shopping Feed Specification:
  • We are improving our support for merchant-defined multipack. For example, many consumer products like toothpaste are sold in custom multipacks. The feed specification now clarifies how such products should be submitted.
  • We are moving towards a world with high-resolution displays. Therefore, we are also starting to recommend higher-quality images with at least 800 pixels in height and width to give users a better visual representation of advertised products.
  • Some products like custom goods, vintage items, or collectibles don't have unique product identifiers. For such products, we are now introducing the 'identifier exists' attribute. Additionally, we have updated our requirements on unique product identifiers.
  • We have updated our guidance for the description and color attributes to make them more precise and actionable.
  • We now provide dedicated support for energy efficiency labels and unit pricing for merchants targeting countries in the European Union and Switzerland.
  • Merchants promoting non-family safe items on family-safe websites can now tag individual items  as non-family safe.
Some of these changes won't be visible to Google Shopping users immediately. We want to give merchants enough time for preparation and adoption. We encourage merchants to use the test feeds feature or the feed debugger to ensure that their updated feeds can be processed correctly.

Merchants can review the new feed specifications and a summary of attribute requirements to help prepare for these changes. They should always make sure to comply with legal requirements while participating in the Google Shopping program.

Enforcement of new Google Shopping Feed Specifications

For accounts that are currently exempted from requiring unique product identifiers, Google Shopping will start enforcing these new requirements for unique product identifiers on July 15th, 2013 in the US, and September 16th, 2013 in all other target countries. Enforcement for all other accounts will start July 15th, 2013 for the US, France, Germany and the United Kingdom, and September 16th, 2013 for all other target countries. Non-compliant items might then be disapproved and disappear from Google Shopping.

Account level exemptions for unique product identifiers won’t be supported after the above mentioned dates – the 'identifier exists' attribute should be used instead.

Posted by Angelika Rohrer, Program Manager, Google Shopping

Monday, April 1, 2013

Introducing the Google Wallet Mobile ATM

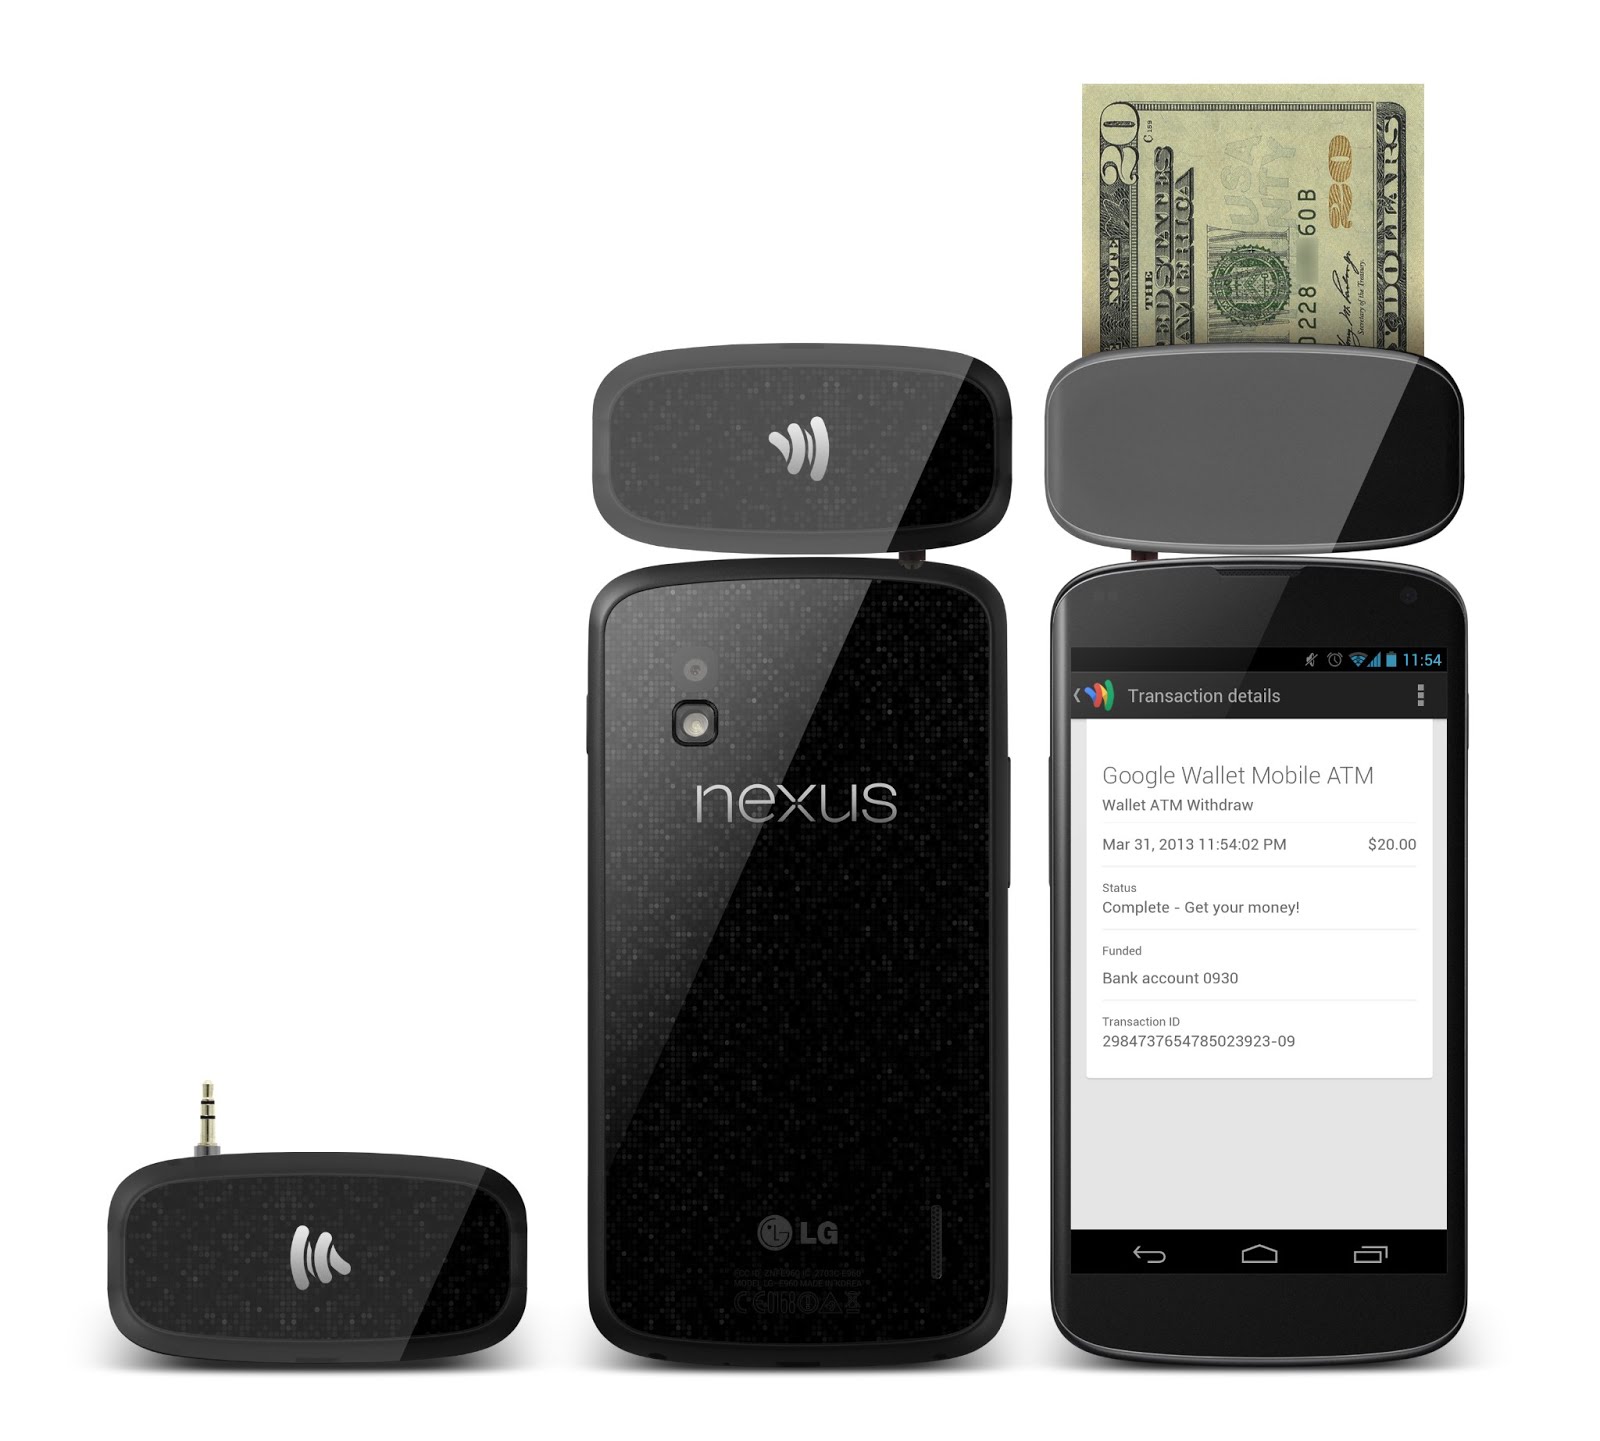
While payments are going digital, we realize that some daily consumer interactions will still require cash. So today, we’re excited to announce the release of the Google Wallet Mobile ATM.

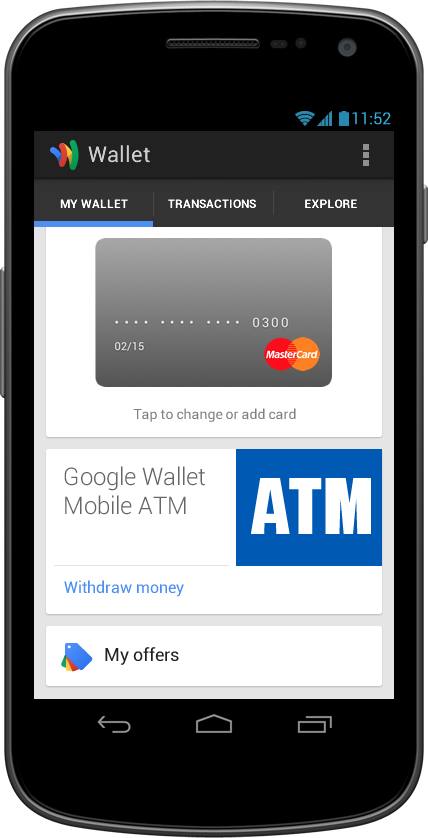
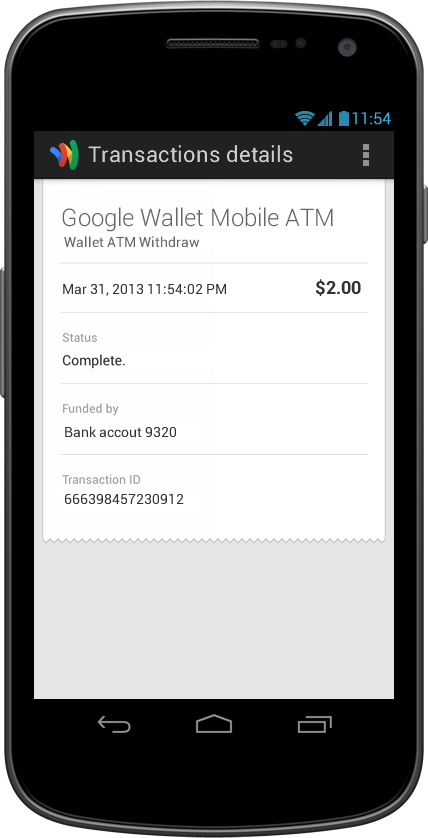
The mobile ATM device easily attaches to most smartphones and dispenses money instantly and effortlessly– forever ending your search for the nearest bank or ATM. Just type in your personal pin code on your cell phone and access all your cash from the palm of your hand.

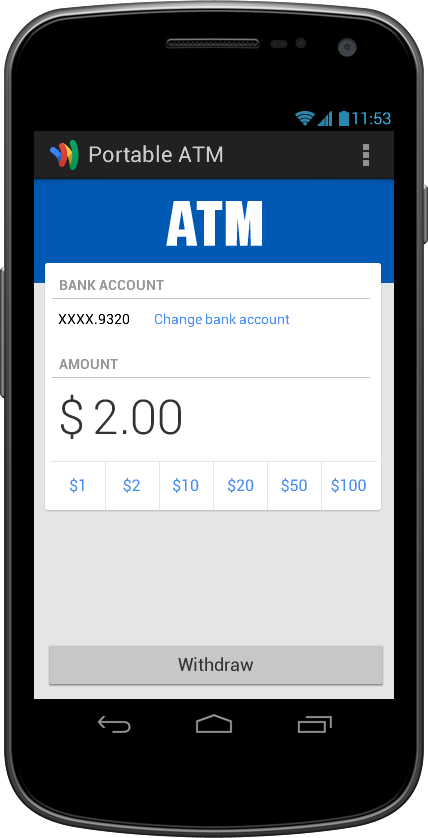
The Google Wallet Mobile ATM technology allows you to enter the amount of money you want to withdraw directly in your phone or use voice-activated dispenser.

                     
Unlike traditional ATM’s, the Google Wallet Mobile ATM even dispenses rare two and fifty dollar bills, as well as more practical one dollar bills. Perfect when confronted by a surprisingly talented “Hippy Mime Banjo Player” on a street corner.

If your mobile ATM is running low on funds, a self-driving, armored, hybrid vehicle will be alerted and dispatched to your location – arriving within minutes to quickly and safely refill their ATM.

We hope you enjoy having easy access to your cash.

Posted by Peter Hazlehurst, Product Management Director, Google Wallet

UPDATE: Happy April Fools Day! While we would all love this feature, technology cannot quite produce this... yet.